こんにちは、YOUTRUST のやまでぃ(YOUTRUST/X)です。
今回はWebアプリケーションのテキストフォーム内におけるタブ補完機能の実装例をご紹介します。
エンジニアのみなさんにとっては GitHub Copilot や Cursor でおなじみの超便利機能ですが、一般的なWebアプリケーション内での実装例はまだ少ないんじゃないかなと思います。
弊社が開発・運用するキャリアSNSのYOUTRUSTでもテキストフォームを利用する機能が複数あり、一部の機能においてはタブ補完によるテキスト入力の負担の軽減を図っています。
これからタブ補完機能を実装してみたい方の参考になればうれしいです。
どんな感じのもの?
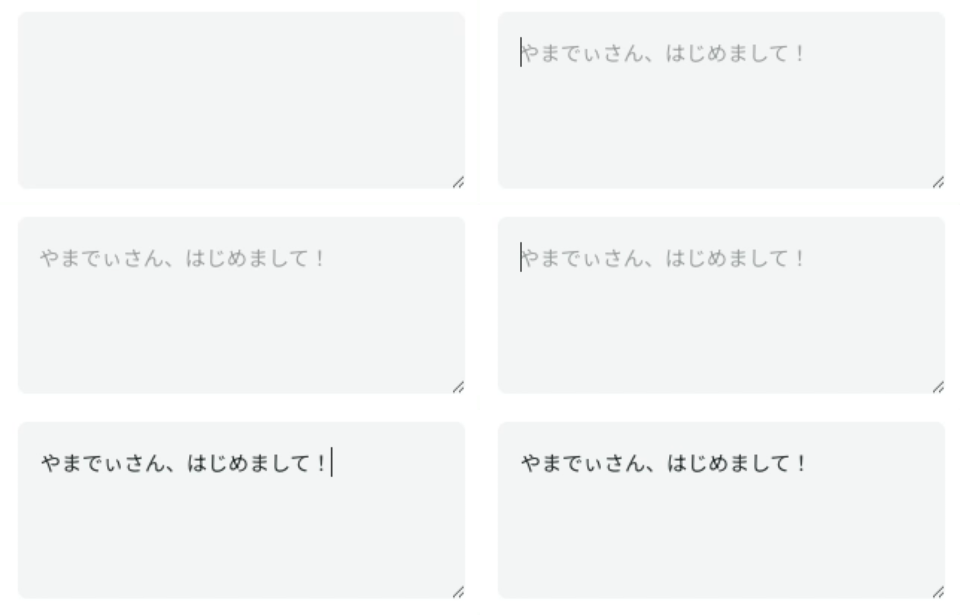
次のGIF画像をご覧ください。
テキストフォームにフォーカスが当たると、補完テキストをグレーで表示し、タブ押下で自動入力されます。

どのように作ったの?
弊社のWebアプリケーションは React で実装されており、一部のテキストフォームでは Draft.js を利用しています※。今回はそれのプラグインという形でタブ補完機能を実装しています。
※ Draft.jsは現在アーカイブ状態 にあります。次世代版として Lexical というものが用意されていますので、利用の際にはご注意ください。
以下に、実装コードの簡易版を記載します。
// Draft.js の利用箇所。
export const EditorWithTabCompletion = () => {
  const { plugins, GhostOverlay } = useMemo(() => {
    const ghostPlugin = createGhostOverlayPlugin();

    return  { plugins: [ghostPlugin], GhostOverlay: ghostPlugin.GhostOverlay };
  }, []);

  return (
    <Box position="relative">
      <DraftJsEditor editorState={editorState} onChange={onChange} plugins={plugins} ... />
      <GhostOverlay /> {/* グレーの補完テキスト表示用 */}
    </Box>
  );
};
// グレーの補完テキストのコンポーネント
const GhostOverlayText = ({ text }: { text: string }) =>
  <span
    style={{
      position: 'absolute',
      left: 0,
      top: 0,
      width: '100%',
      opacity: 0.4,
      pointerEvents: 'none',
      userSelect: 'none',
      whiteSpace: 'pre-wrap',
      wordBreak: 'break-word',
    }}
  >
    {text}
  </span>;

// テキスト補完用のプラグイン
export const createGhostOverlayPlugin = (): EditorPlugin & { GhostOverlay: React.FC } => {
  const store = {
    ghost: '', // 補完テキスト
    setGhost: () => {};
  };

  const GhostOverlay = () => {
    const [, force] = useState(0);

    useEffect(() => {
      store.setGhost = g => {
        store.ghost = g;
        force(n => n + 1); // 補完テキスト更新時にレンダリングを発生させる。
      };
    }, []);

    return <GhostOverlayText text={store.ghost} />;
  }

  const suggestGhostText = async () => {
    const { data } = await getGhostTextFromApiServer(); // APIリクエスト
    store.setGhost(data.ghost);
  };

  // プラグイン本体
  const plugin: EditorPlugin = {
    onChange: (editorState: EditorState) => {
      setGhost('');

      // 今回はフォームが空の場合にのみゴーストテキストを表示するようにしています。
      if (isFocusAndEmpty(editorState)) { // 自作のutility関数(内容は省略)
        suggestGhostText();
      }

      return editorState;
    },

    keyBindingFn: (e: React.KeyboardEvent<Element>) => {
      // タブ押下時に補完処理を実行する。
      if (e.key === 'Tab' && !e.shiftKey && !hasCommandModifier(e) && store.ghost.length > 0) {
        return 'accept-ghost';
      }
      return getDefaultKeyBinding(e);
    },

    handleKeyCommand: (cmd: string, editorState: EditorState, _, { setEditorState }: PluginFunctions) => {
      if (cmd === 'accept-ghost') {
        // 現在のキャレット位置にゴーストテキストを追加
        const newContentState = Modifier.replaceWithFragment(
          editorState.getCurrentContent(),
          editorState.getSelection(),
          ContentState.createFromText(store.ghost).getBlockMap(),
        );

        const newEditorState = EditorState.push(editorState, newContentState, 'insert-fragment');

        setEditorState(newEditorState);

        setGhost('');
        return 'handled';
      }
      return 'not-handled';
    },
  };

  return { ...plugin, GhostOverlay };
}
実際のプロダクションコードではエッジケース対応や独自ユースケースを満たすもっと複雑なものになっていますが、雰囲気は伝わったのではないかなと思います。
おわりに
今回の記事は以上となります。
YOUTRUSTのエンジニアリングにもし興味を持っていただけましたら、是非下記の募集一覧もチェックしてみてください!